
Introduction
The Arduino Fire Detection System is an innovative safety project that combines a flame sensor and a smoke sensor to provide early fire detection. Unlike traditional fire alarm projects that rely on a single sensor, this system uses two different sensing technologies to improve detection accuracy and response time.
The flame sensor detects visible flames, while the smoke sensor identifies smoke and flammable gases such as methane, butane, and hydrogen. By combining both sensors, the system can detect potential fire hazards before they become dangerous.
This project is an excellent example of Class 10 STEM Activities, helping students learn about Arduino programming, sensor interfacing, safety systems, and embedded electronics.
Table of Contents
What is an Arduino Fire Detection System?
An Arduino Fire Detection System is a safety device that detects fire hazards using sensors and provides immediate alerts through visual and audio indicators.
This project uses:
- Flame Sensor
- Smoke Sensor (Gas Sensor)
- Arduino Uno
- LED Indicator
- Buzzer
When either smoke or flames are detected, the Arduino activates the LED and buzzer, alerting users about a potential fire emergency.
Features
- Dual-sensor fire detection
- Early smoke detection
- Flame detection capability
- Audible buzzer alerts
- Visual LED indication
- Low-cost and beginner-friendly design
Learning Objectives
By building this Arduino Fire Detection System, students will learn:
- Arduino Programming
- Sensor Interfacing
- Analog Signal Processing
- Fire Safety Technologies
- Embedded Systems Fundamentals
- Conditional Statements in Arduino
- Real-Time Monitoring Systems
Components Required
| Component | Quantity |
|---|---|
| Arduino Uno | 1 |
| Flame Sensor Module | 1 |
| Smoke Sensor (MQ2) | 1 |
| LED | 1 |
| Buzzer | 1 |
| 1K Resistor | 1 |
| Breadboard | 1 |
| Jumper Wires | Several |
| USB Cable | 1 |

Working Principle
The Arduino Fire Detection System works using two sensors.
Flame Sensor
The flame sensor detects infrared light emitted by flames.
Key points:
- Detects visible flames
- Requires direct line of sight
- Sensor value decreases when flame is detected
Smoke Sensor
The smoke sensor detects:
- Smoke particles
- Methane gas
- Butane gas
- Hydrogen gas
- Other flammable gases
Key points:
- Provides early warning before visible flames appear
- Sensor value increases when smoke concentration rises
Alert System
If smoke or flame is detected:
- LED turns ON
- Buzzer sounds an alarm
This allows quick response to fire hazards.
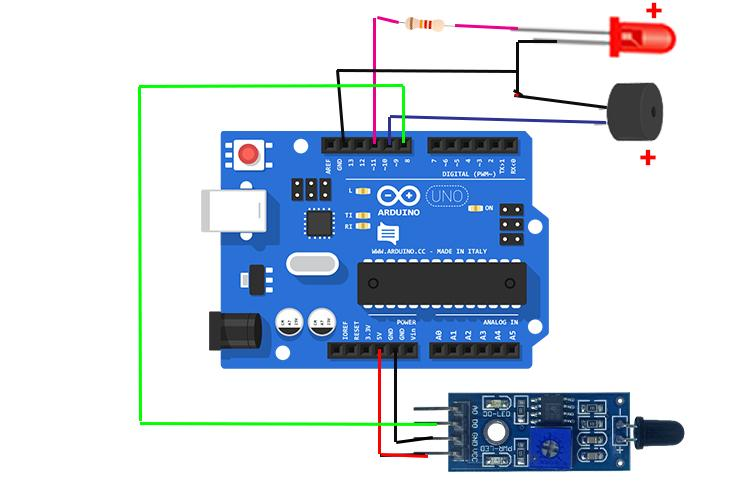
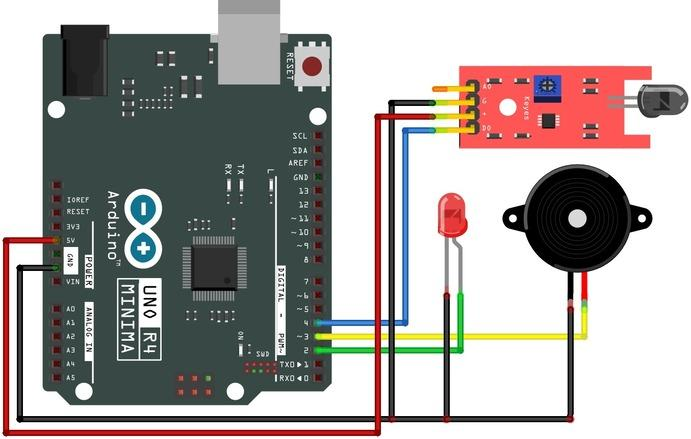
Circuit Connections
Smoke Sensor Connections
| Smoke Sensor Pin | Arduino Pin |
|---|---|
| VCC | 5V |
| GND | GND |
| AO | A0 |
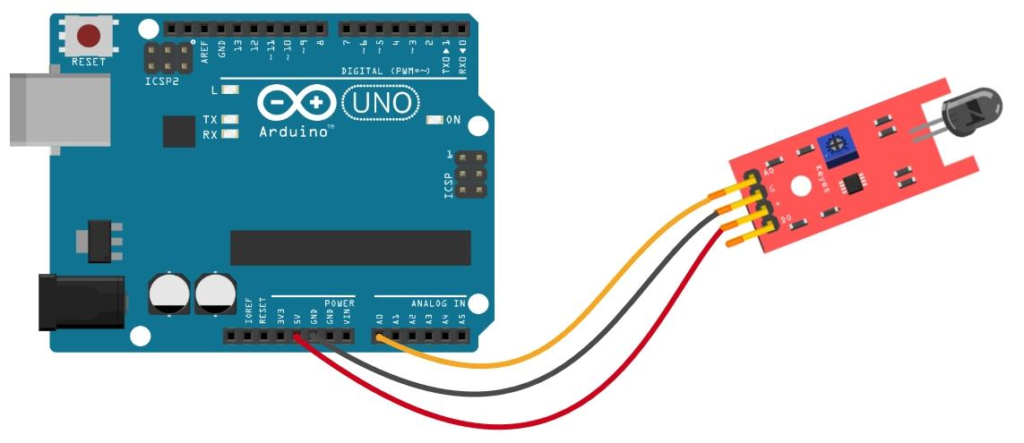
Flame Sensor Connections
| Flame Sensor Pin | Arduino Pin |
|---|---|
| VCC | 5V |
| GND | GND |
| AO | A1 |
LED Connections
| LED Pin | Arduino Pin |
|---|---|
| Positive | Pin 4 via 1K Resistor |
| Negative | GND |
Buzzer Connections
| Buzzer Pin | Arduino Pin |
|---|---|
| Positive | Pin 3 |
| Negative | GND |
Project Algorithm
Step 1
Connect the smoke sensor to Analog Pin A0.
Step 2
Connect the flame sensor to Analog Pin A1.
Step 3
Connect the LED to Digital Pin 4.
Step 4
Connect the buzzer to Digital Pin 3.
Step 5
Read sensor values continuously.
Step 6
Check smoke sensor threshold.
Step 7
Check flame sensor threshold.
Step 8
Activate buzzer and LED if danger is detected.
Step 9
Repeat continuously.
Arduino Fire Detection System Code
int flame = A1;
int smoke = A0;

int led = 4;
int buzzer = 3;

int flame_val;
int smoke_val;

void setup()
{
  pinMode(led, OUTPUT);
  pinMode(buzzer, OUTPUT);

  Serial.begin(9600);
}

void alert()
{
  digitalWrite(led, HIGH);
  digitalWrite(buzzer, HIGH);

  delay(500);

  digitalWrite(led, LOW);
  digitalWrite(buzzer, LOW);

  delay(500);
}

void loop()
{
  flame_val = analogRead(flame);
  smoke_val = analogRead(smoke);

  Serial.print("Flame: ");
  Serial.println(flame_val);

  Serial.print("Smoke: ");
  Serial.println(smoke_val);

  if(smoke_val > 200)
  {
    alert();
  }

  else if(flame_val < 900)
  {
    alert();
  }

  else
  {
    digitalWrite(led, LOW);
    digitalWrite(buzzer, LOW);
  }
}
Code Explanation
Sensor Variables
int flame = A1;
int smoke = A0;
Assigns sensor pins.
Output Devices
int led = 4;
int buzzer = 3;
Defines alert components.
Sensor Reading
analogRead()
Reads analog values from sensors.
Smoke Detection
if(smoke_val > 200)
Triggers alert when smoke level exceeds threshold.
Flame Detection
if(flame_val < 900)
Triggers alert when flame is detected.
Alert Function
void alert()
Controls LED blinking and buzzer sound.
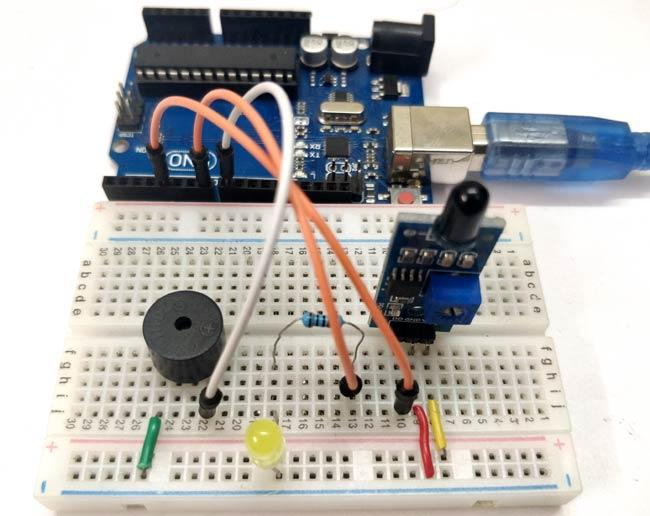
Project Output
Normal Condition
- LED OFF
- Buzzer OFF
Smoke Detected
- LED ON
- Buzzer ON
Flame Detected
- LED ON
- Buzzer ON
The system continuously monitors the environment and responds instantly to fire hazards.
Applications of Arduino Fire Detection System
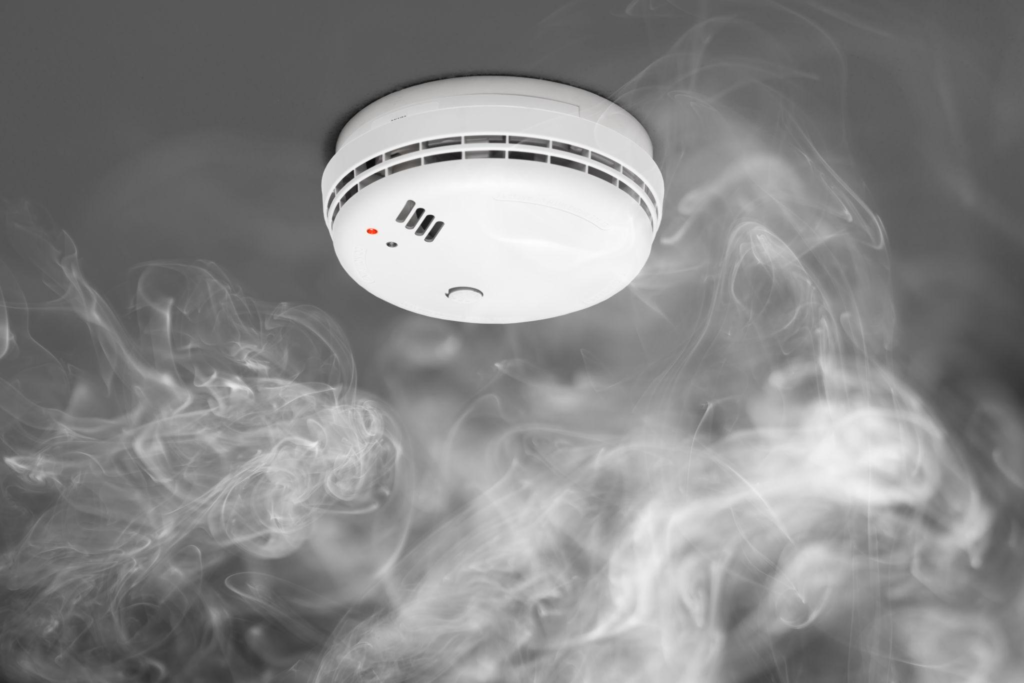
Home Fire Safety
Detect fire hazards inside homes.
Office Buildings
Monitor smoke and flames in workspaces.
Warehouses
Protect valuable inventory from fire accidents.
Laboratories
Improve safety in research environments.
Industrial Monitoring
Detect hazardous fire conditions in factories.
Educational Projects
Learn embedded systems and sensor technologies.
Why Learn STEM with RoboSiddhi?
RoboSiddhi promotes practical STEM education through hands-on projects.
Benefits include:
- Project-Based Learning
- Arduino Programming Skills
- Sensor Integration Experience
- Problem-Solving Development
- Real-World Applications
- Industry-Relevant Knowledge
- Interactive Learning Environment
The Arduino Fire Detection System helps students understand how modern fire alarm systems operate while building strong electronics and programming skills.
Frequently Asked Questions
Why use two sensors instead of one?
Using both flame and smoke sensors improves detection accuracy and provides earlier warnings.
Which sensor detects smoke?
The smoke sensor (MQ2) detects smoke and flammable gases.
Which sensor detects flames?
The flame sensor detects infrared radiation emitted by fire.
Why is a resistor used with the LED?
The resistor limits current and protects the LED from damage.
Is this project suitable for beginners?
Yes. This project is ideal for Class 10 students and beginners learning Arduino.
Can this project be expanded?
Yes. It can be integrated with GSM modules, IoT platforms, and smart home systems.
YouTube Tutorial
Watch the complete tutorial to learn:
- Arduino Fire Detection System Setup
- Flame Sensor Connections
- Smoke Sensor Calibration
- LED and Buzzer Alert System
- Arduino Programming
- Real-Time Fire Detection Testing
Conclusion
The Arduino Fire Detection System Using Flame and Smoke Sensor is a practical and educational project that demonstrates how multiple sensors can work together to improve fire safety. By combining smoke detection and flame detection technologies, the system provides faster and more reliable alerts than traditional single-sensor solutions.
As one of the most valuable Class 10 STEM Activities, this project introduces students to sensor interfacing, Arduino programming, and safety system design while providing hands-on experience with real-world engineering applications.