
Introduction
The DIY Merry-Go-Round Project using Arduino is a fun and educational STEM activity that demonstrates how automation can be used to control moving objects. Inspired by amusement park rides, this project uses an Arduino Uno and a motor to create a rotating carousel that spins automatically.
This project helps students learn about Arduino programming, motor control, automation, and basic electronics while building a miniature fair ride model. It is ideal for school exhibitions, science fairs, robotics workshops, and beginner STEM projects.
As part of STEM learning activities, the DIY Merry-Go-Round Project using Arduino introduces real-world applications of embedded systems in an engaging and creative way.
Why Watch This DIY Merry-Go-Round Project Tutorial?
This project provides a practical introduction to Arduino-based automation. Students learn how programming and electronics work together to create a moving fair ride model. It combines creativity with engineering concepts, making learning both fun and interactive.
Table of Contents
What is an Arduino Merry-Go-Round Project?
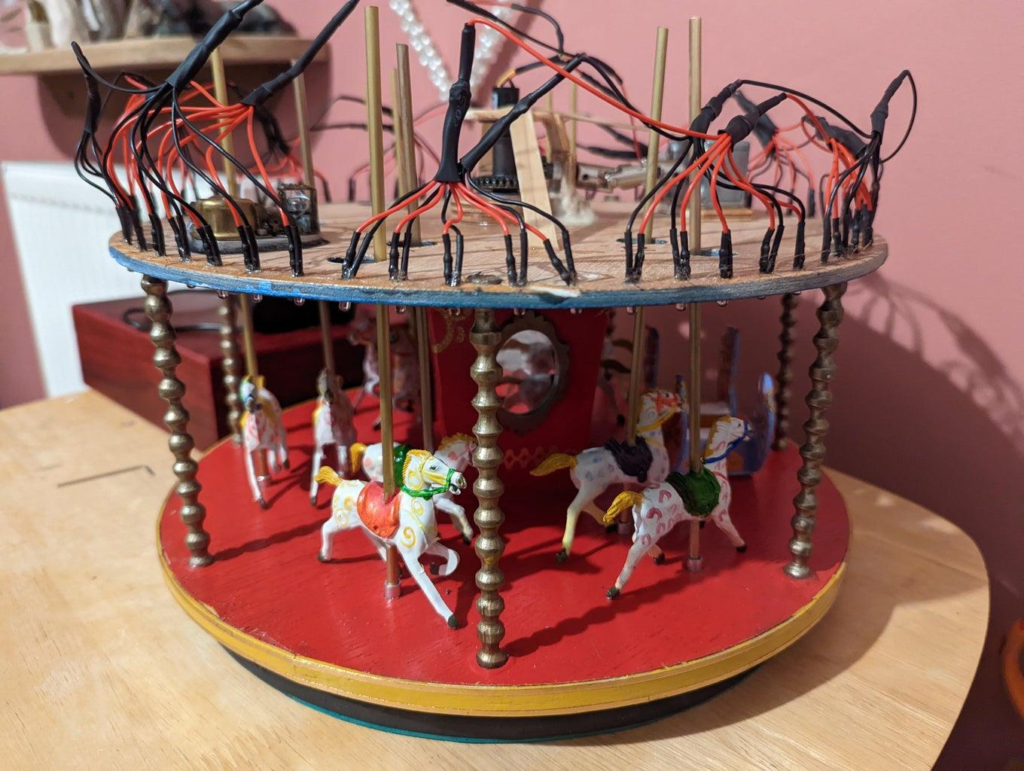
An Arduino Merry-Go-Round Project is a miniature automated carousel that rotates continuously using a motor controlled by an Arduino board.
The Arduino sends signals to the motor, causing the platform to spin automatically, just like a real amusement park ride.
Features
- Automatic rotation
- Arduino-based control
- Beginner-friendly electronics project
- Interactive STEM learning activity
- Ideal for exhibitions and demonstrations
- Easy to build and customize
Learning Objectives for DIY Merry-Go-Round Project using Arduino
By completing this DIY Merry-Go-Round Project using Arduino, students will learn:
- Arduino Programming
- Motor Control Basics
- Electrical Circuit Connections
- Automation Concepts
- Robotics Fundamentals
- Problem-Solving Skills
- STEM Project Development
These concepts form the foundation of many robotics and automation systems.
Components Required
| Component | Quantity |
|---|---|
| Arduino Uno | 1 |
| Servo Motor or DC Motor | 1 |
| Motor Driver Module (if using DC Motor) | 1 |
| Breadboard | 1 |
| Jumper Wires | Several |
| USB Cable | 1 |
| Cardboard or Circular Platform | 1 |
| Decorative Miniature Seats | Optional |
Working Principle of DIY Merry-Go-Round Project using Arduino
The DIY Merry-Go-Round Project using Arduino works by controlling a motor through programmed instructions.
Arduino Uno
The Arduino acts as the brain of the project.
It:
- Executes the uploaded code
- Controls motor movement
- Maintains continuous rotation
Motor
The motor converts electrical energy into mechanical movement.
It:
- Rotates the carousel platform
- Creates the spinning motion of the ride
Rotating Platform
The platform is mounted on the motor shaft and rotates automatically when the motor runs
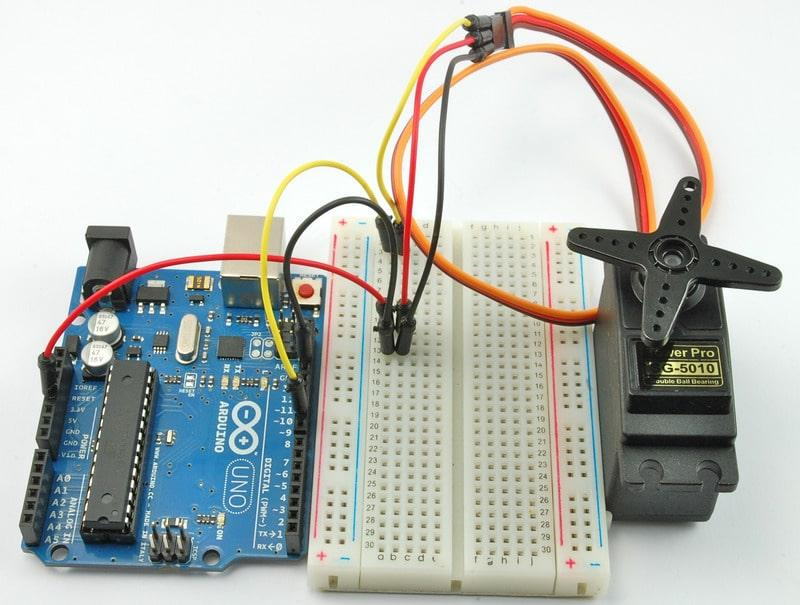
Circuit Connections
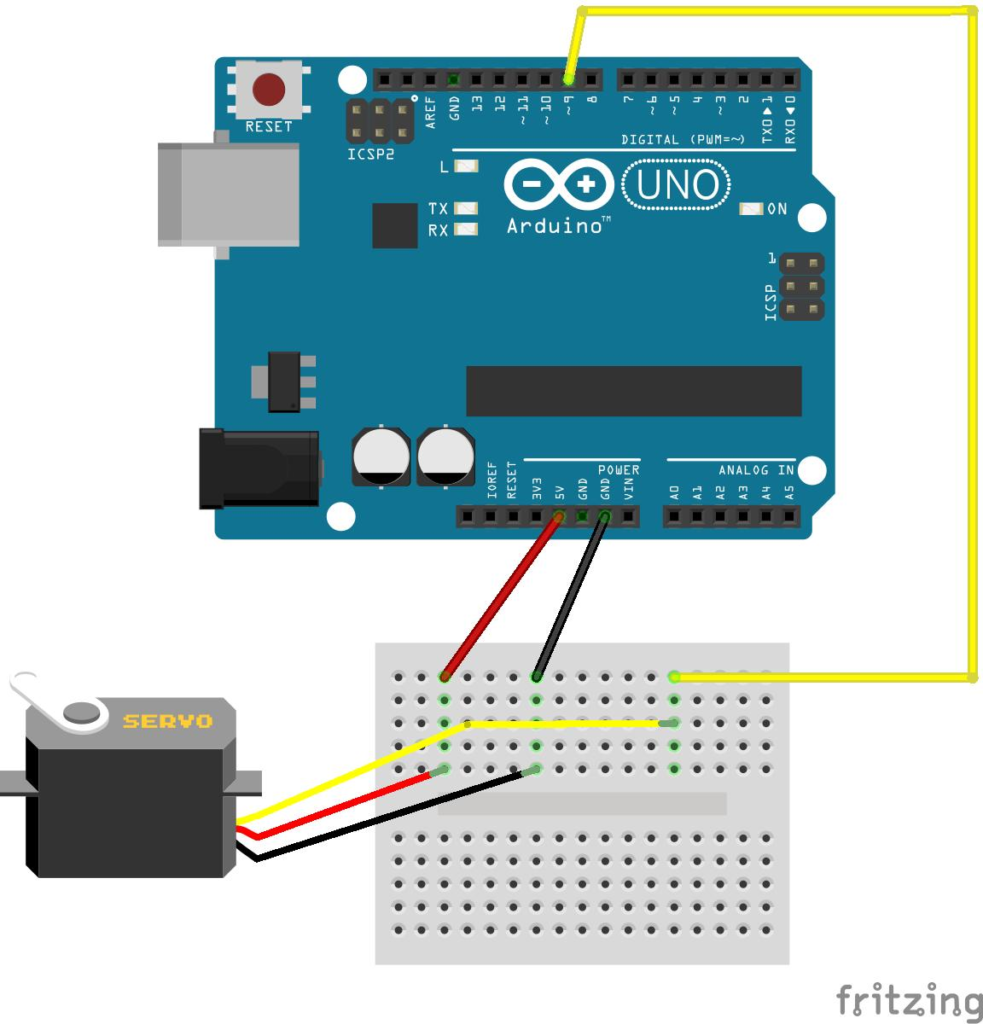
Servo Motor Connection
| Servo Pin | Arduino Pin |
|---|---|
| VCC | 5V |
| GND | GND |
| Signal | Digital Pin 9 |
If using a DC motor, connect it through a suitable motor driver module.
Project Algorithm
Step 1
Connect the motor to the Arduino.
Step 2
Create the carousel platform.
Step 3
Upload the Arduino code.
Step 4
Initialize the motor.
Step 5
Rotate the motor continuously.
Step 6
Observe the spinning merry-go-round.
Step 7
Modify speed if required.
Arduino Merry-Go-Round Code
#include <Servo.h>

Servo merryGoRound;

void setup() {
  merryGoRound.attach(9);
}

void loop() {

  for(int pos = 0; pos <= 180; pos++) {
    merryGoRound.write(pos);
    delay(15);
  }

  for(int pos = 180; pos >= 0; pos--) {
    merryGoRound.write(pos);
    delay(15);
  }
}
Code Explanation
Including Servo Library
#include <Servo.h>This library helps control servo motors easily.
Creating Servo Object
Servo merryGoRound;Creates a servo motor object.
Attaching Servo
merryGoRound.attach(9);Connects the servo motor to digital pin 9.
Rotating Forward
for(int pos = 0; pos <= 180; pos++)Moves the motor from 0° to 180°.
Rotating Backward
for(int pos = 180; pos >= 0; pos--)Returns the motor back to its original position.
Project Output
After uploading the code:
- The motor starts rotating automatically.
- The merry-go-round platform begins moving.
- Continuous movement simulates a fair ride.
- Students can observe motor control in action.
Expected Result
Merry-Go-Round rotates automatically
using Arduino motor control.
Applications of DIY Merry-Go-Round Project using Arduino
School Science Exhibitions
Demonstrate automation concepts in an interactive way.
Robotics Workshops
Teach beginners about motor control and programming.
STEM Education
Introduce practical electronics and coding skills.
Amusement Ride Models
Create miniature working amusement park attractions.
Automation Learning
Understand how motors are controlled in real-world machines.
Engineering Projects
Explore mechanical and electrical system integration.
Why Learn STEM with RoboSiddhi?
RoboSiddhi promotes hands-on learning through engaging STEM projects.
Benefits include:
- Practical Learning Experience
- Arduino Programming Skills
- Robotics Fundamentals
- Innovation and Creativity
- Problem-Solving Development
- Real-World Project Building
- Industry-Relevant STEM Activities
The DIY Merry-Go-Round Project using Arduino helps students understand automation while building a fun and visually appealing model.
Frequently Asked Questions
What is the purpose of this project?
The project demonstrates motor control and automation using Arduino.
Which Arduino board is used?
Arduino Uno is commonly used.
Can I use a DC motor instead of a servo motor?
Yes. A DC motor can be used with a motor driver module.
Is this project suitable for beginners?
Yes. It is an excellent beginner-level Arduino project.
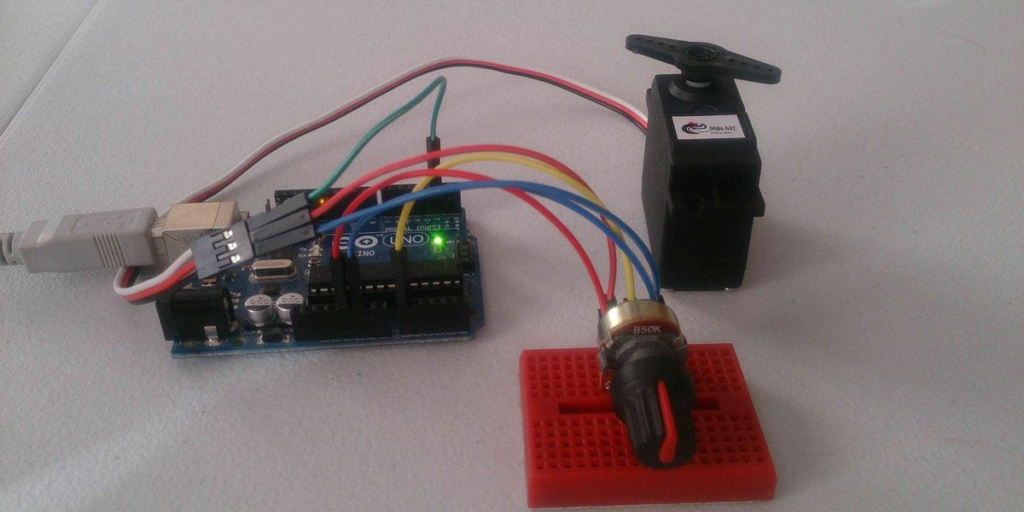
Can I change the rotation speed?
Yes. Speed can be adjusted by modifying delay values or motor control settings.
Where can this project be used?
School exhibitions, STEM workshops, robotics training sessions, and science fairs.
Conclusion
The DIY Merry-Go-Round Project using Arduino is a creative and beginner-friendly STEM project that demonstrates how motors and microcontrollers can be used to automate motion. By building a miniature carousel, students gain hands-on experience with Arduino programming, motor control, and basic robotics concepts.
As one of the most engaging STEM activities for beginners, this project encourages innovation, creativity, and practical problem-solving while making technology learning exciting and enjoyable.