
Learn how to build an Arduino DHT11 Temperature Monitoring Project with this step-by-step guide for Grade 9 STEM Activities. Measure temperature and humidity in real time using Arduino and DHT11 sensor.
Arduino DHT11 Temperature Monitoring Project (Grade 9 STEM Activities)
Introduction
The Arduino DHT11 Temperature Monitoring Project is one of the most exciting and beginner-friendly projects in Grade 9 STEM Activities. Have you ever wondered how weather stations, air conditioners, or smart home devices measure temperature and humidity? The answer lies in sensors like the DHT11.
In this project, students will learn how to connect a DHT11 temperature and humidity sensor to an Arduino Uno and display real-time readings on the Serial Monitor. This hands-on activity introduces important STEM concepts such as sensors, data collection, programming, and electronics.
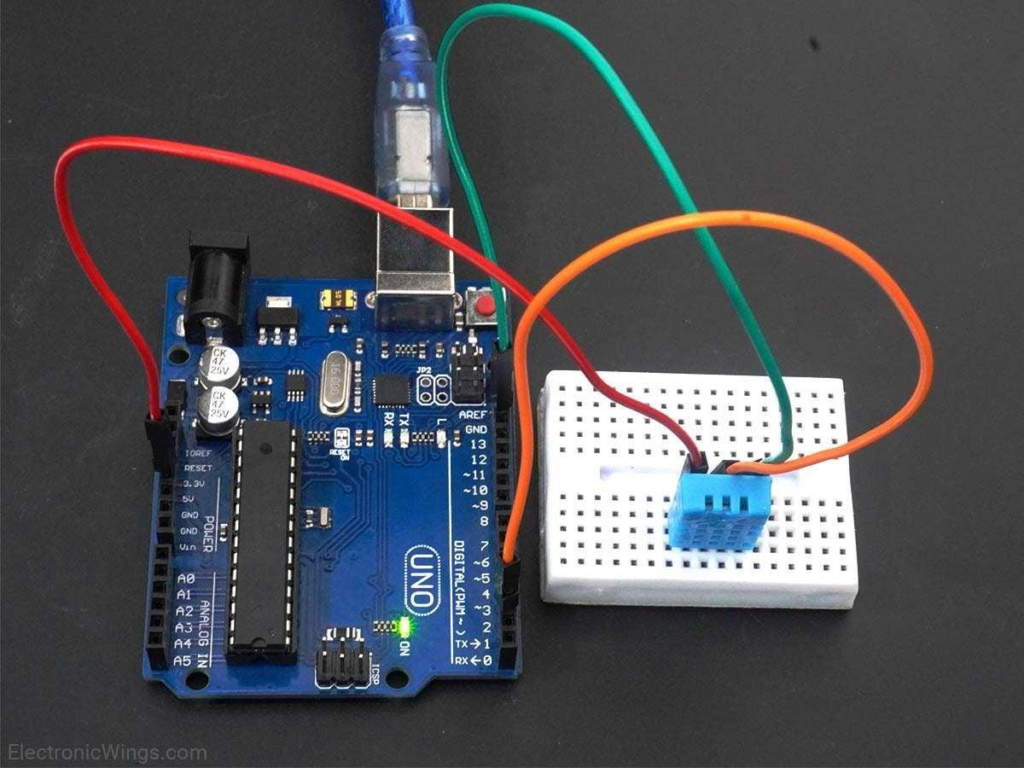
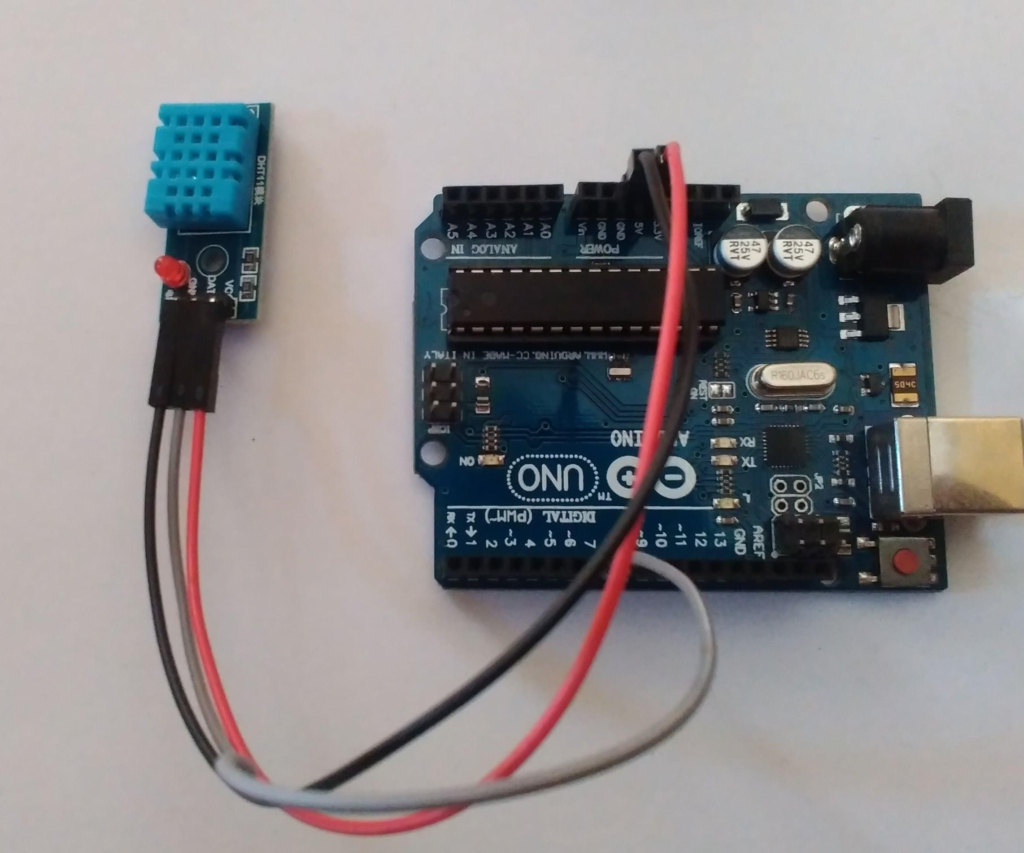
Arduino Uno connected with DHT11 sensor for real-time temperature and humidity monitoring.
Watch the Arduino DHT11 Temperature Monitoring Project Tutorial
Table of Contents
What is the Arduino DHT11 Temperature Monitoring Project?
The Arduino DHT11 Temperature Monitoring Project is a simple electronics experiment that uses a DHT11 sensor to measure environmental temperature and humidity.
The Arduino board receives the data from the sensor and displays it on the Serial Monitor. This allows users to monitor room conditions in real time.
This project is especially useful for Grade 9 STEM Activities because it combines science, technology, engineering, and mathematics into a practical learning experience.
Learning Objectives
- Understand how sensors collect environmental data
- Learn basic Arduino programming
- Build a real-time monitoring system
- Explore temperature and humidity measurement concepts
- Develop problem-solving and electronics skills
Components Required
To build the Arduino DHT11 Temperature Monitoring Project, you will need:
| Component | Quantity |
|---|---|
| Arduino Uno | 1 |
| DHT11 Sensor | 1 |
| Jumper Wires | 3 |
| USB Cable | 1 |
| Computer/Laptop | 1 |
Optional:
- Breadboard
- LCD Display (for future upgrades)
DHT11 Sensor Pin Configuration
The DHT11 sensor is a popular digital sensor capable of measuring both temperature and humidity.
It has three important connections:
| Sensor Pin | Function | Arduino Connection |
|---|---|---|
| VCC | Power Supply | 5V |
| GND | Ground | GND |
| DATA | Signal Output | Digital Pin 2 |
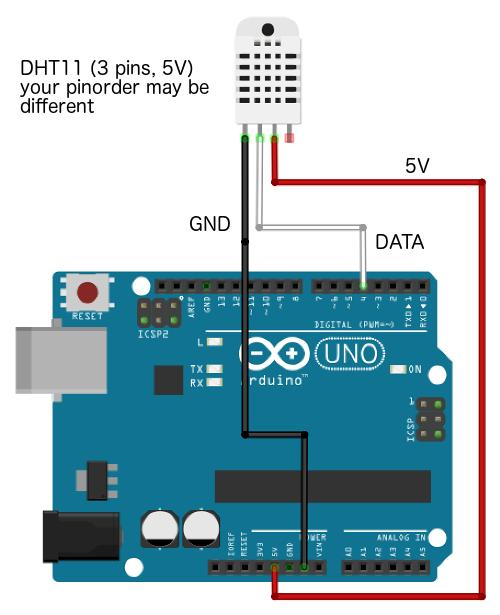
Pin configuration of the DHT11 sensor connected to Arduino Uno.
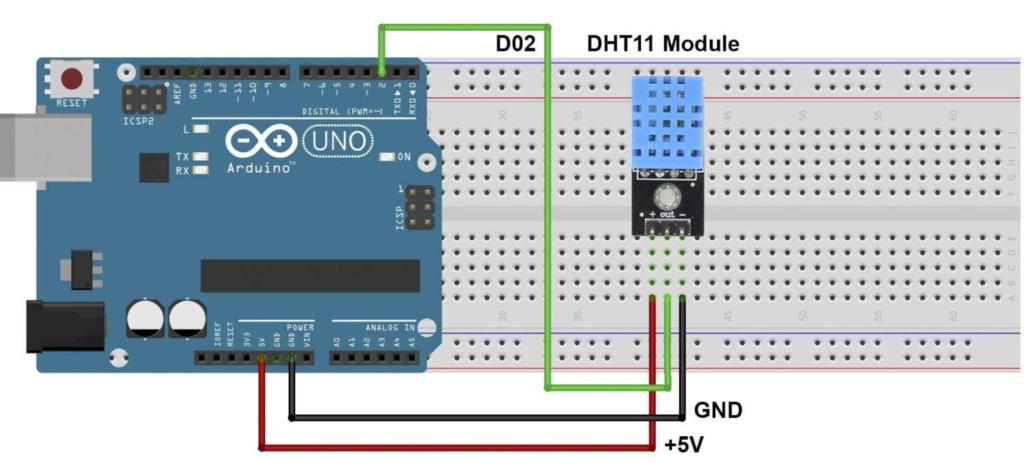
Circuit Connections
Follow these simple wiring steps:
Step 1
Connect the VCC pin of the DHT11 sensor to the 5V pin on Arduino.
Step 2
Connect the GND pin of the DHT11 sensor to the GND pin on Arduino.
Step 3
Connect the DATA pin of the DHT11 sensor to Digital Pin 2 on Arduino.
Step 4
Connect the Arduino board to your computer using a USB cable.
Once these connections are completed, your hardware setup is ready.
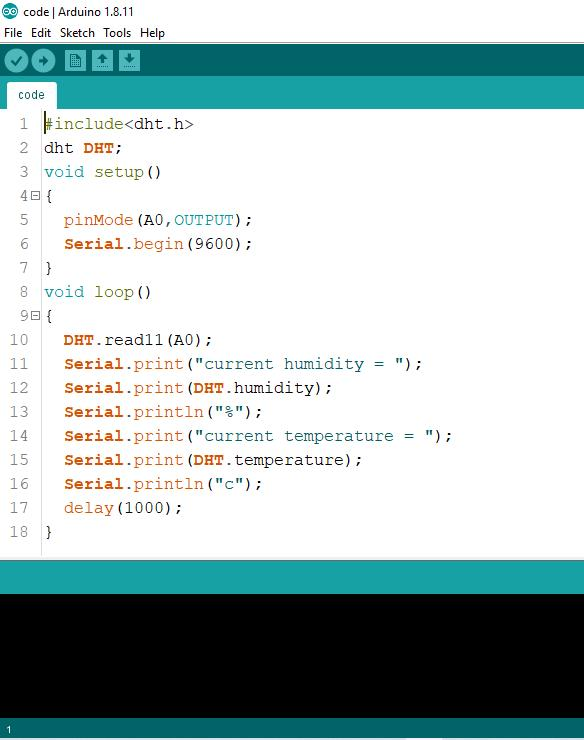
Arduino Code
Before uploading the code, install the DHT sensor library in the Arduino IDE.
#include <DHT.h>

#define DHTPIN 2
#define DHTTYPE DHT11

DHT dht(DHTPIN, DHTTYPE);

void setup() {
  Serial.begin(9600);
  dht.begin();
}

void loop() {

  float humidity = dht.readHumidity();
  float temperatureC = dht.readTemperature();
  float temperatureF = dht.readTemperature(true);

  Serial.print("Humidity: ");
  Serial.print(humidity);
  Serial.println("%");

  Serial.print("Temperature: ");
  Serial.print(temperatureC);
  Serial.println("°C");

  Serial.print("Temperature: ");
  Serial.print(temperatureF);
  Serial.println("°F");

  delay(2000);
}
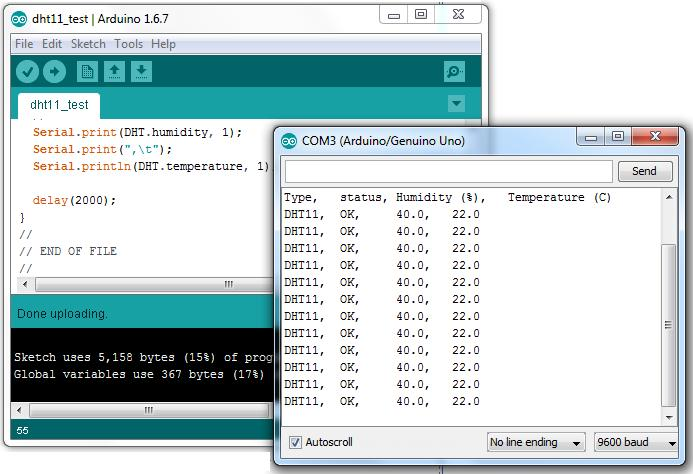
Arduino sketch used to read and display temperature and humidity data.
How the Project Works
The working principle of the Arduino DHT11 Temperature Monitoring Project is straightforward.
- The DHT11 sensor measures surrounding temperature and humidity.
- The sensor sends the readings digitally to the Arduino.
- Arduino processes the incoming data.
- The processed information is displayed on the Serial Monitor.
- New readings appear every 2 seconds.
This creates a real-time environmental monitoring system.
Output and Results
After uploading the code:
- Open Arduino IDE.
- Click on Serial Monitor.
- Set the baud rate to 9600.
You will see readings similar to:
Humidity: 32%
Temperature: 28°C
Temperature: 82.4°F
The values automatically update every 2 seconds.
Applications of Temperature Monitoring Systems
The Arduino DHT11 Temperature Monitoring Project demonstrates technologies used in many real-world applications.
Smart Homes
Temperature sensors help control fans and air conditioners automatically.
Weather Stations
Environmental sensors continuously monitor weather conditions.
Greenhouses
Farmers use temperature monitoring systems to maintain ideal growing conditions.
Data Centers
Servers are monitored to prevent overheating.
Industrial Automation
Factories use sensors to ensure safe operating temperatures.
Troubleshooting Tips
Sensor Not Showing Data
Check that all wiring connections are correct.
Upload Error
Verify that the correct Arduino board and COM port are selected.
Invalid Readings
Make sure the DHT11 library is properly installed.
Serial Monitor Blank
Confirm that the baud rate is set to 9600.
Values Not Updating
Check whether the sensor data pin is connected to Digital Pin 2.
STEM Concepts Covered
This project helps students understand:
- Sensors and data acquisition
- Environmental science
- Electronics and circuits
- Computer programming
- Real-time monitoring systems
These concepts make it an excellent project for Grade 9 STEM Activities and beginner electronics learners.
Why Learn STEM Projects with RoboSiddhi?
At RoboSiddhi, we believe that learning becomes more effective when students can see science and technology in action. Our hands-on STEM activities are designed to help students develop practical skills, critical thinking abilities, and creativity through engaging projects.
The Arduino DHT11 Temperature Monitoring Project is one of many exciting STEM projects available through RoboSiddhi. By working on real-world applications like temperature and humidity monitoring, students gain valuable experience in electronics, programming, sensor technology, and problem-solving.
Benefits of Learning with RoboSiddhi
- Project-based learning approach
- Easy-to-follow tutorials for beginners
- STEM activities aligned with school learning
- Hands-on experience with Arduino and electronics
- Development of coding and engineering skills
- Encouragement of innovation and creativity
Whether you are a student, parent, or educator, RoboSiddhi provides a wide range of STEM projects that make learning interactive, enjoyable, and meaningful.
Explore more exciting projects, robotics activities, coding tutorials, and STEM experiments to continue your learning journey with RoboSiddhi.
Conclusion
The Arduino DHT11 Temperature Monitoring Project is an excellent introduction to electronics and sensor technology. With only a few components and simple coding, students can build a system capable of measuring and displaying temperature and humidity in real time.
As a Grade 9 STEM Activity, this project encourages creativity, logical thinking, and hands-on learning. It also serves as a foundation for more advanced projects such as weather stations, smart home automation systems, and LCD-based monitoring displays.
By completing this project, students gain valuable experience in programming, circuit design, and data analysis while having fun exploring the world of STEM.
Frequently Asked Questions
What is a DHT11 sensor?
The DHT11 is a digital sensor used to measure temperature and humidity.
Why is DHT11 popular for beginners?
It is affordable, easy to connect, and simple to program.
Can this project display temperature in Fahrenheit?
Yes. The Arduino code can display readings in both Celsius and Fahrenheit.
How often does the sensor update?
The DHT11 typically provides new readings every 1–2 seconds.
Is this project suitable for Grade 9 students?
Yes. It is one of the best beginner projects for Grade 9 STEM Activities because it combines electronics, coding, and scientific measurement.
Explore More STEM Activities with RoboSiddhi
Ready to build more exciting projects? Visit RoboSiddhi to discover hands-on STEM activities, Arduino projects, robotics tutorials, coding lessons, and innovation-based learning resources designed for students of all ages.
From beginner-friendly sensor projects to advanced robotics applications, RoboSiddhi helps learners develop the practical skills needed for the future.
Start exploring today and take your STEM learning journey to the next level!
Useful Resources
Arduino Official Website:
https://www.arduino.cc
Arduino IDE Download:
https://www.arduino.cc/en/software
DHT Sensor Library:
https://github.com/adafruit/DHT-sensor-library