
Introduction
ESP32 DHT11 Environmental Monitoring System is an exciting Internet of Things (IoT) project that allows students to monitor temperature and humidity through a web browser. Using an ESP32 microcontroller and a DHT11 sensor, this project collects environmental data and displays it in real time over a Wi-Fi network.
The project introduces learners to sensor interfacing, wireless communication, web server creation, and IoT technology. It is an excellent example of Grade 9 STEM Activities because it combines science, electronics, programming, and networking into one practical experiment.
Watch the Project Tutorial
Learn how to create an ESP32 DHT11 Environmental Monitoring System that displays live temperature and humidity readings on a web browser using Wi-Fi connectivity.
Table of Contents
What is ESP32?
The ESP32 is a powerful microcontroller with built-in Wi-Fi and Bluetooth capabilities. It is widely used in IoT applications because it can communicate wirelessly without requiring additional modules.
Key Features
- Built-in Wi-Fi
- Built-in Bluetooth
- Multiple GPIO pins
- Fast processing speed
- Suitable for IoT applications
- Low power consumption
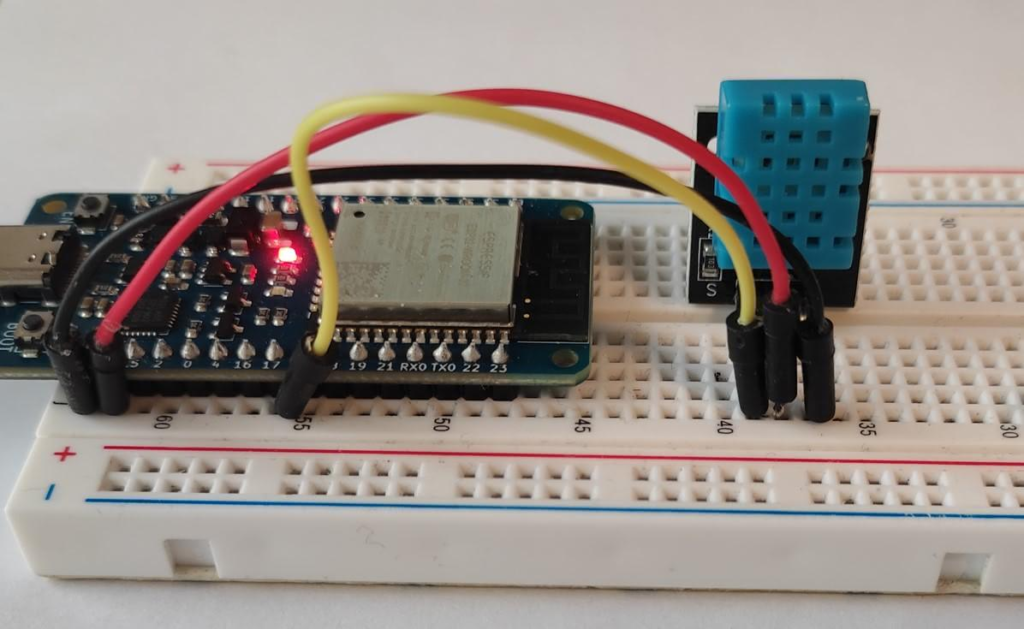
ESP32 microcontroller connected with a DHT11 sensor on a breadboard.
What is DHT11 Sensor?
The DHT11 is a digital sensor used to measure:
- Temperature
- Humidity
It is commonly used in weather stations, environmental monitoring systems, and smart home projects.
DHT11 Pin Configuration
| DHT11 Pin | Connection |
|---|---|
| VCC | ESP32 VCC |
| Signal | GPIO 4 |
| GND | ESP32 GN |
Components Required for ESP32 DHT11 Environmental Monitoring System
| Component | Quantity |
|---|---|
| ESP32 Development Board | 1 |
| DHT11 Sensor | 1 |
| Breadboard | 1 |
| Jumper Wires | Several |
| USB Cable | 1 |
| Smartphone Hotspot | 1 |
| Computer with Arduino IDE | 1 |
Circuit Connections
Follow these wiring steps:
Step 1
Place the ESP32 on the breadboard.
Step 2
Connect the DHT11 signal pin to GPIO 4 of ESP32.
Step 3
Connect the DHT11 VCC pin to ESP32 VCC.
Step 4
Connect the DHT11 GND pin to ESP32 GND.
Connection Table
| Sensor Pin | ESP32 Pin |
|---|---|
| Signal | GPIO 4 |
| VCC | VCC |
| GND | GND |
Working Principle of ESP32 DHT11 Environmental Monitoring System
The ESP32 DHT11 Environmental Monitoring System works in the following way:
- DHT11 measures temperature and humidity.
- ESP32 reads sensor data.
- ESP32 connects to Wi-Fi.
- ESP32 hosts a web server.
- Sensor data is displayed on a web page.
- Users can view readings from any browser connected to the same network.
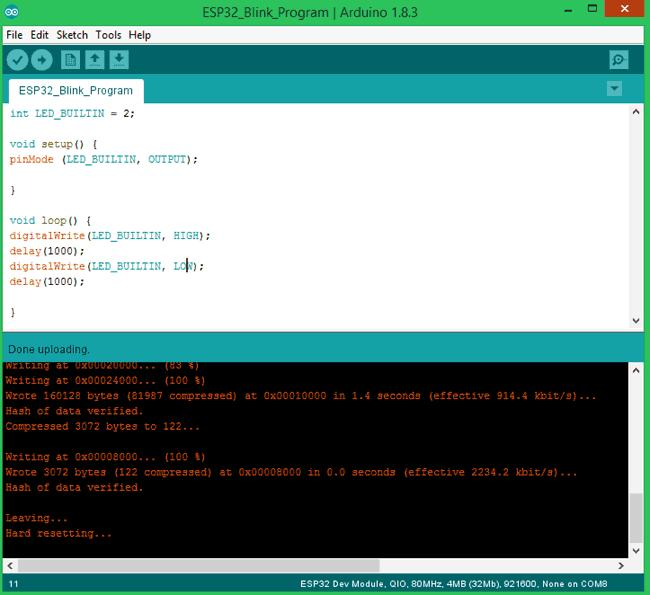
Arduino Code
Required Libraries
#include <WiFi.h>
#include <WebServer.h>
#include <DHT.h>
These libraries help the ESP32 communicate with Wi-Fi and the DHT11 sensor while creating a web server.
Wi-Fi Configuration
const char* ssid = "YourSSID";
const char* password = "YourPassword";
Replace these values with your Wi-Fi hotspot credentials.
Sensor Pin Definition
#define DHTPIN 4The DHT11 signal pin is connected to GPIO 4.

Arduino code used for sensor data collection and web server communication.
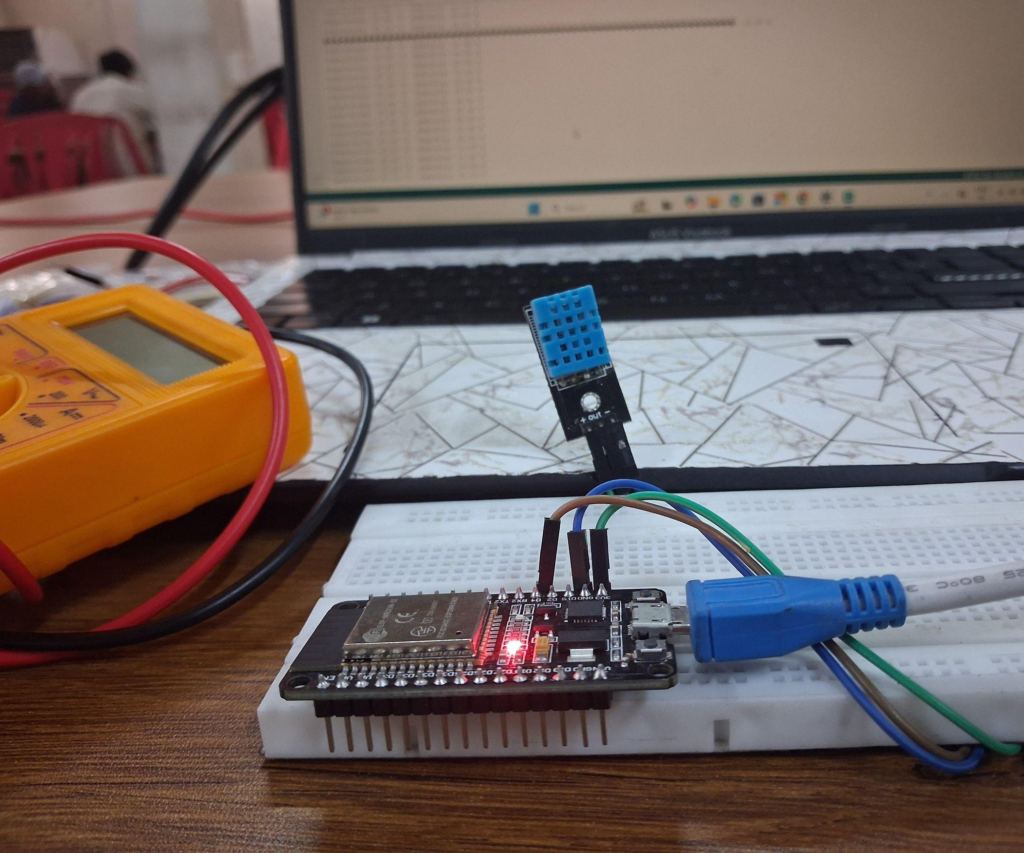
Uploading Code to ESP32
Step 1
Connect the ESP32 to the computer using a USB cable.
Step 2
Open Arduino IDE.
Step 3
Select:
Tools → Board → ESP32 Dev Module
Step 4
Choose the correct COM port.
Step 5
Click Upload.
Step 6
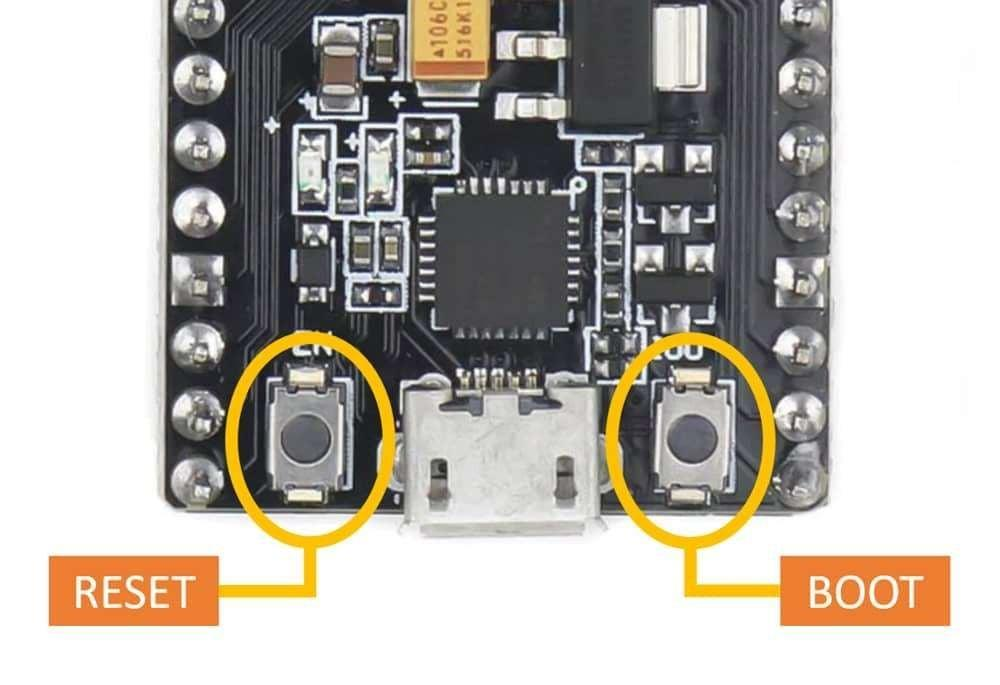
When the IDE displays “Connecting”, press the BOOT button.
Step 7
After uploading, press the RESET button.
Uploading the environmental monitoring program to the ESP32 board.
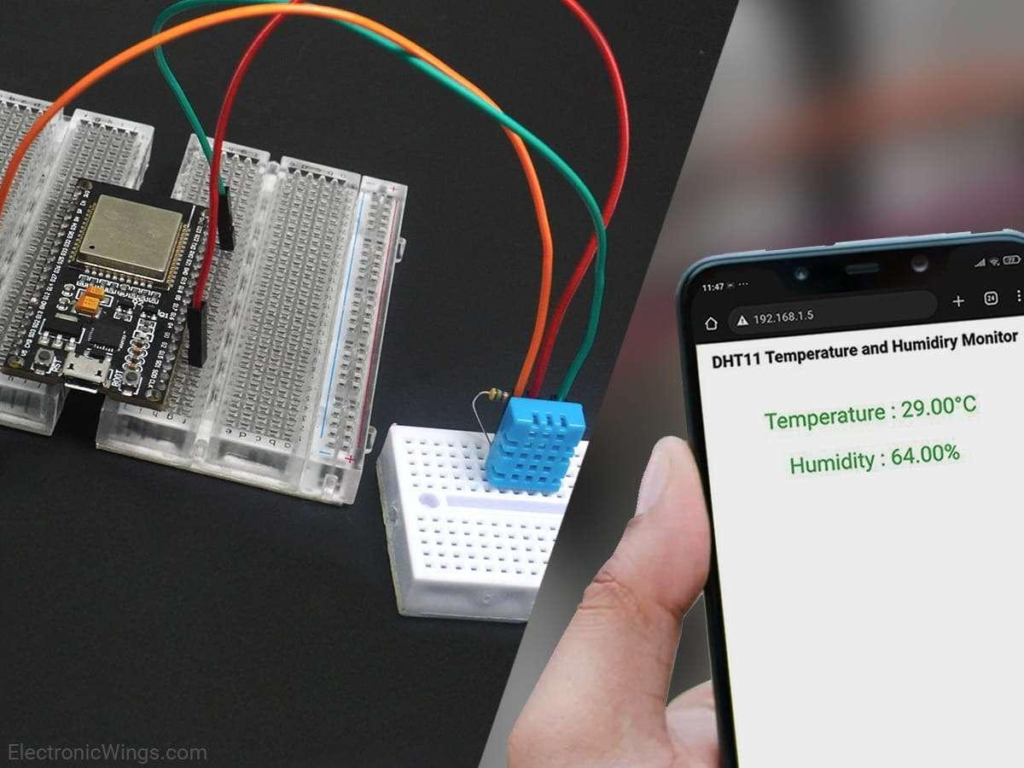
Viewing Sensor Data on Browser
After restarting:
- Enable the hotspot configured in the code.
- ESP32 connects automatically.
- Serial Monitor displays an IP address.
- Enter the IP address in a browser.
- Live temperature and humidity values appear on the webpage.
This creates a simple environmental monitoring dashboard.
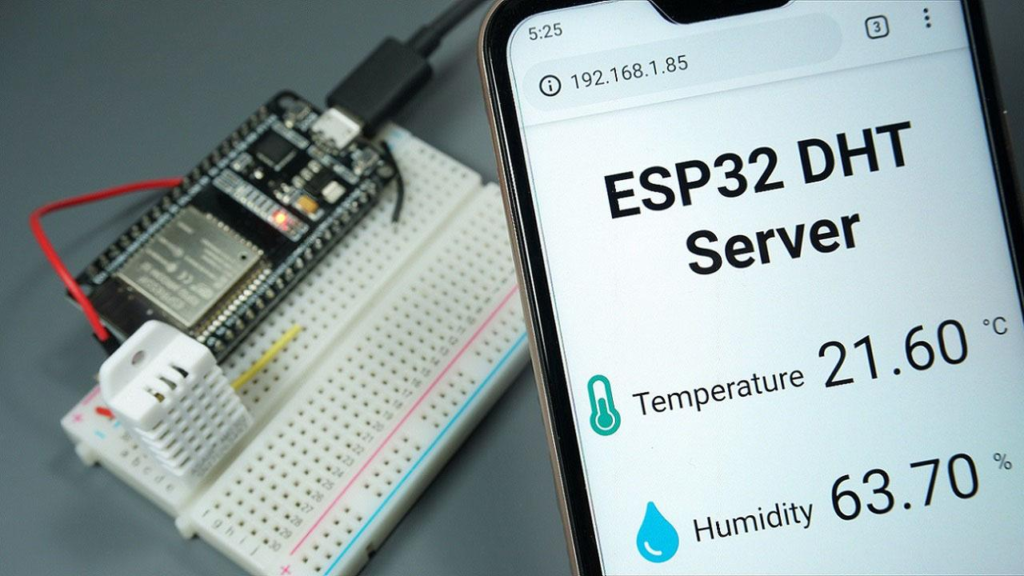
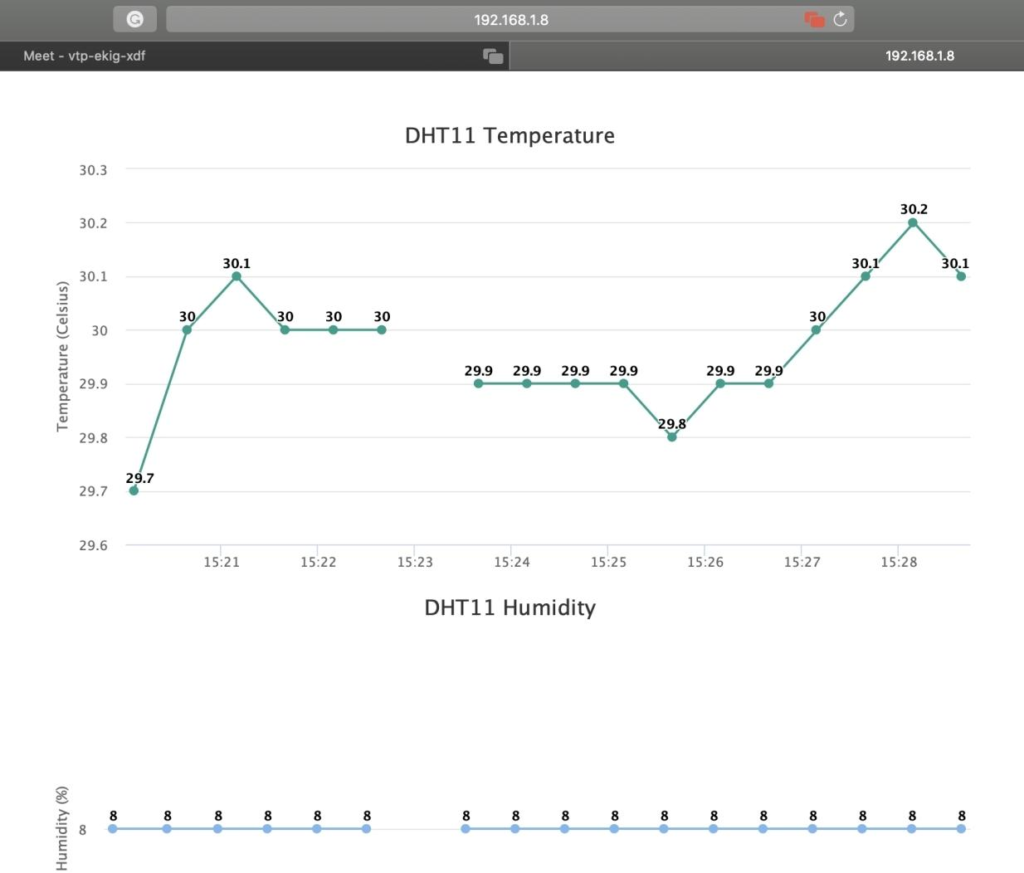
Temperature and humidity values displayed through the ESP32 web server.
Applications of Environmental Monitoring Systems
Smart Homes
Monitor indoor environmental conditions.
Weather Monitoring
Collect temperature and humidity data.
Agriculture
Monitor greenhouse environments.
Industrial Monitoring
Track environmental conditions in factories.
IoT Projects
Create connected monitoring systems.
Why Learn STEM Projects with RoboSiddhi?
At RoboSiddhi, students gain practical experience through project-based learning.
This ESP32 DHT11 Environmental Monitoring System helps students understand:
- IoT technology
- Sensor interfacing
- Wireless communication
- Web server programming
- Environmental monitoring
These skills prepare learners for future careers in electronics, robotics, and computer science.
Frequently Asked Questions
What does the DHT11 sensor measure?
The DHT11 sensor measures temperature and humidity.
Which GPIO pin is used?
GPIO 4 is used for sensor communication.
Which libraries are required?
- WiFi.h
- WebServer.h
- DHT.h
How is data viewed?
Sensor data is displayed through a web browser using the ESP32 web server.
Is this project suitable for beginners?
Yes, it is an excellent beginner-friendly IoT project and a great Grade 9 STEM Activity.
Conclusion
The ESP32 DHT11 Environmental Monitoring System is an excellent IoT project that teaches students how sensors, Wi-Fi communication, and web servers work together. By combining the ESP32 and DHT11 sensor, learners can build a real-time monitoring system that displays environmental data through a web browser.
This project is ideal for Grade 9 STEM Activities because it develops practical skills in electronics, programming, networking, and IoT technology while encouraging hands-on learning.